Assign and install apps automatically
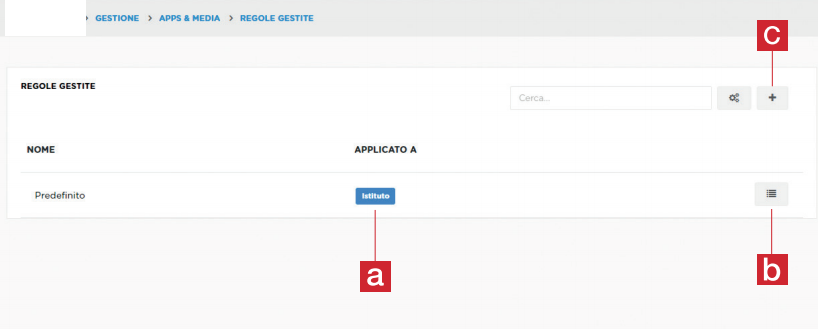
The ‘Organization’ rule [a] already exists by default and can be modified [b] (changes will take effect on all Organization devices) but can’t be eliminated. You can create other rules related to specific classes or students by clicking the ‘+’ button [c]
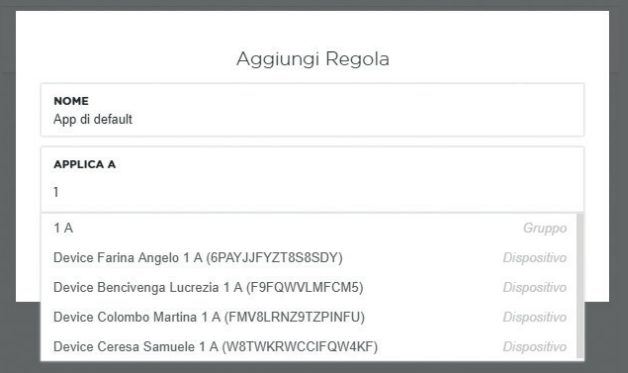
Once you have decided to create a new rule, the ‘Add Rule’ window will open, here you can assign a name to the rule and the field of application, which can go from a class to specific devices if they have already been supervised.
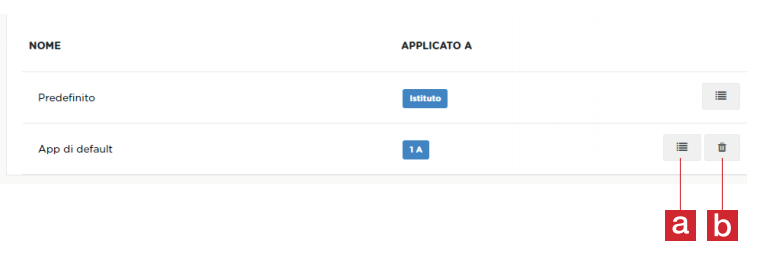
The new rules can be modified [a] or deleted [b]. We continue in the tutorial modifing the rule we have just created.
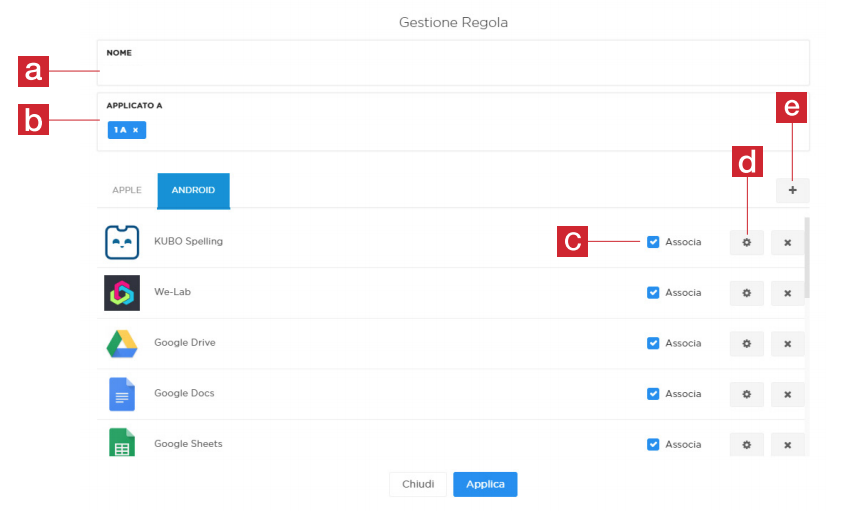
The ‘Management Rule’ panel allows you to:
- Rename the rule [a]
- Apply the rule to certain classes [b]
- Associate to the desired classes the specific rules for each App [c], divided by Android or Apple environment
- Define these rules based on specific parameters [d]
- Add App to the rule, going to choose them from the list defined in the previous chapter [e]
Add and App to the rule
[mobile]
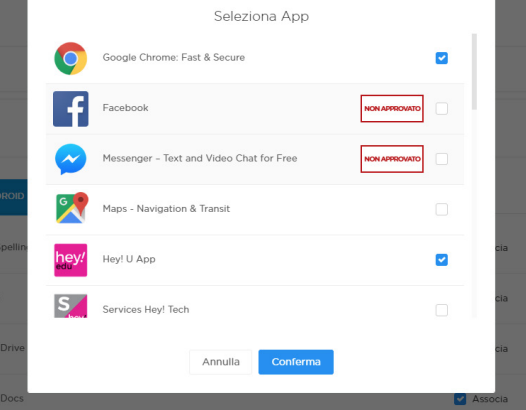
The ‘Select App’ panel shows the list of approved applications, through which you can add them to the rule you are creating.
Assignments and installation for this case requires devices that support Google Services (GMS) and have Google Play enabled.
[/mobile]
Using "Search in Play Store" is possible to search ad add app that must be used only for Managed Configurations or Runtime permissions.
Using "Serach Apk" is possible to search in Aptoide or to specify Play Store url. This way is supported by all devices, without Google Services (GMS) too.
