Firewall rules
This section allows you to enter policies with the related sub-rules for managing the firewall.
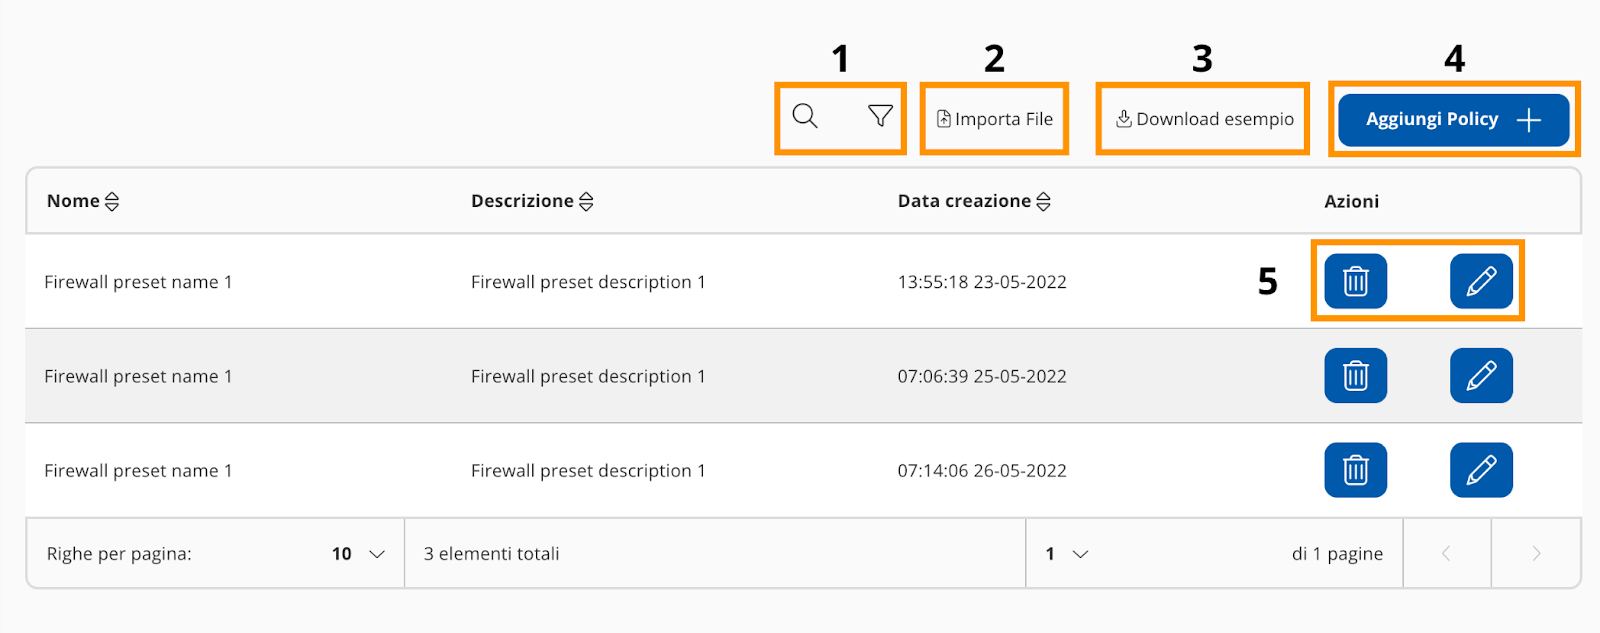
In image 36 it is possible to view the different functions of the section which consist of:
- Filter and search.
- Configure a new policy from a .csv file. By clicking on “Import file” it will be possible to load
the previously configured .csv file. - If you do not know how the .csv file should be compiled, you can download an example by
clicking on "Download example". - The “Add policy +” button allows you to insert a new policy with a first rule through a wizard.
- In the table there are two action buttons that allow you to delete or modify a previously inserted policy.
 |
|---|
| Image 36 |
Procedure for inserting a new policy
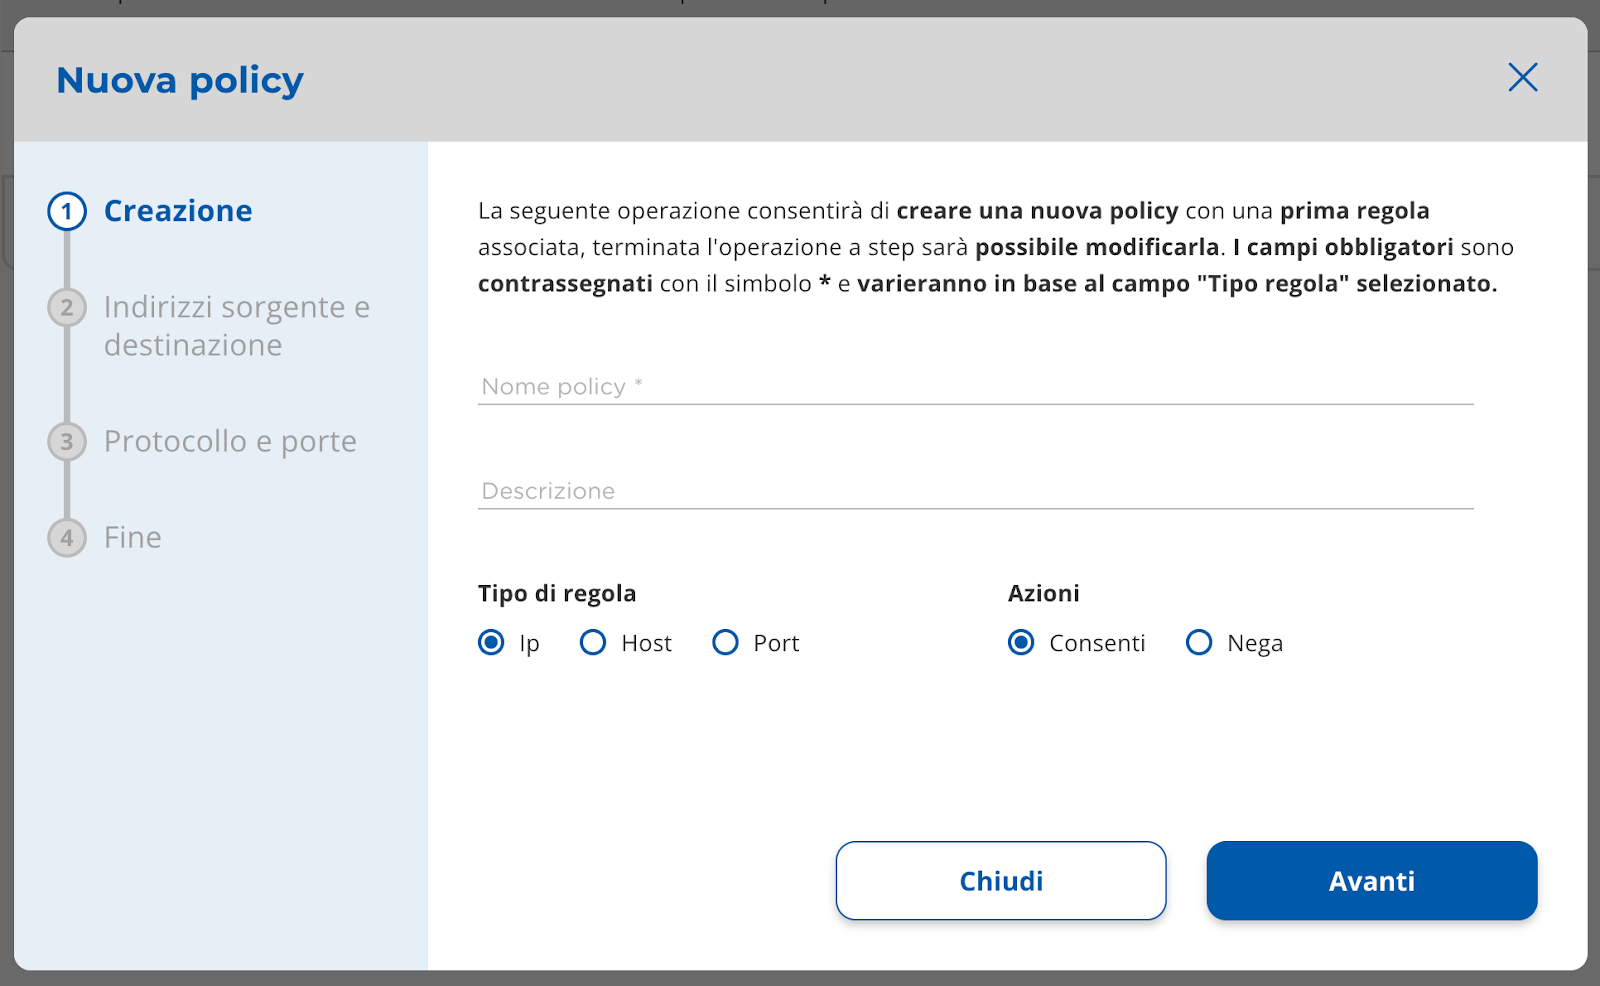
By selecting the button “Add policy +” (Image 36) a layer will open with the wizard for entering the
policy (Image 37).
You can configure the policy without using the wizard by clicking on "Advanced setup".
In the first step of creating the required fields are:
- Policy name.
- Rule type.
- Action.
The selection of “Rule type” will determine which are the mandatory fields of the next steps.
 |
|---|
| Image 37 |
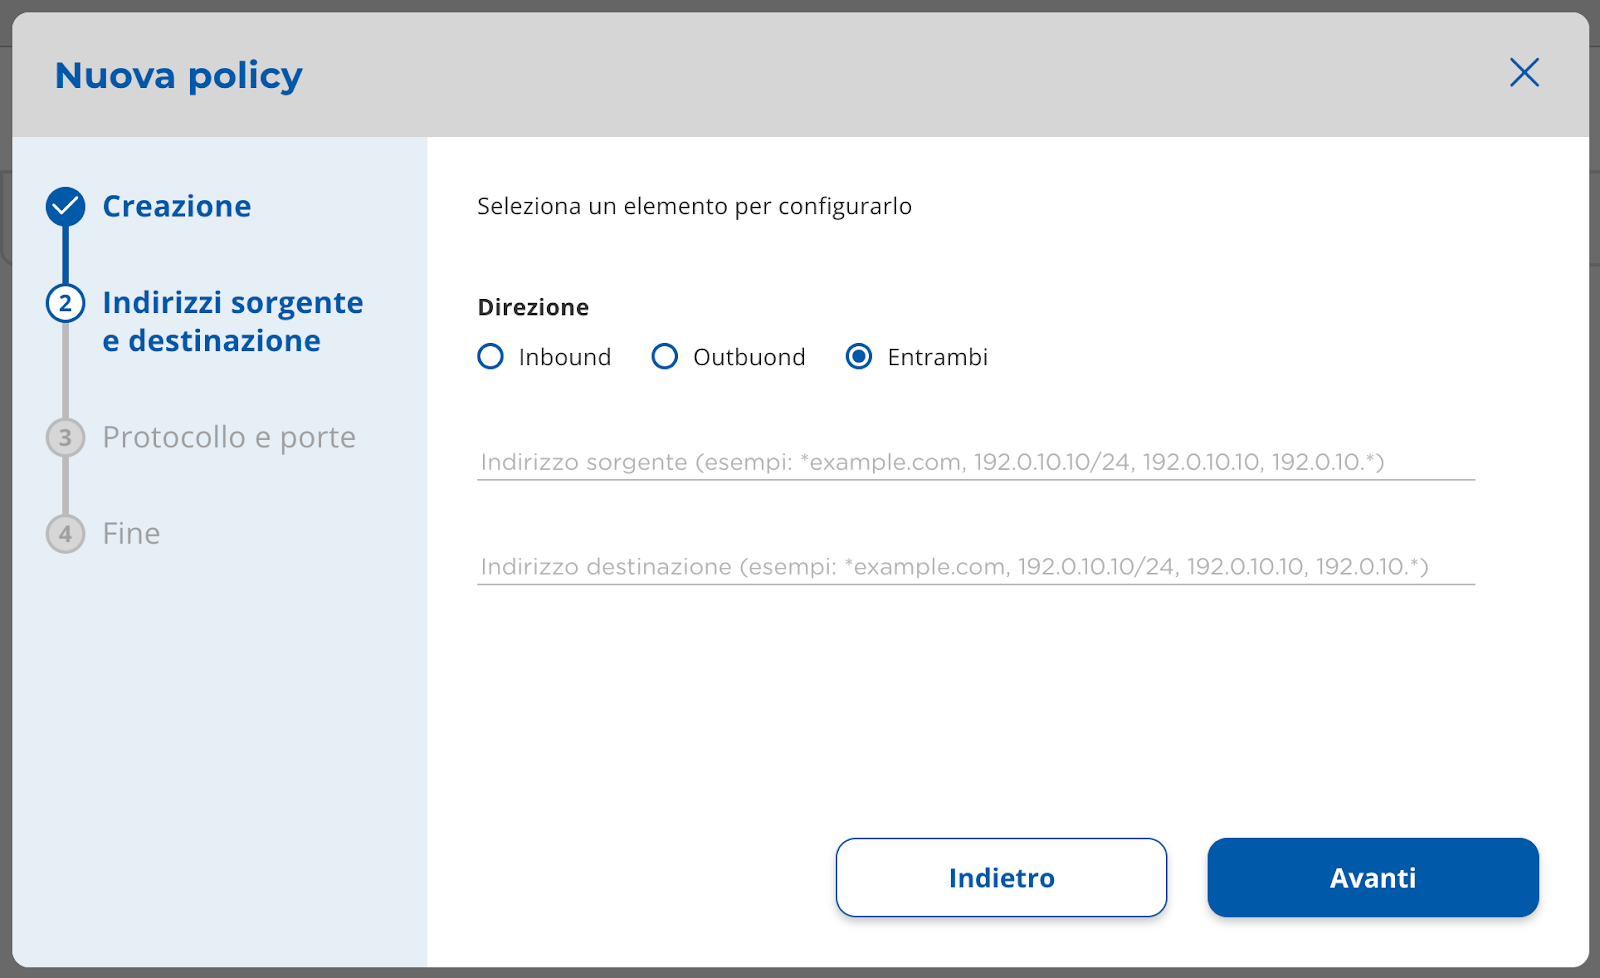
In the second step (Image 38) the mandatory fields are “Direction” and IP addresses only if in the first step “IP” or “Host” were selected as “Rule type”.
The “Direction” can be:
- Inbound.
- Outbound.
- Entrambi (Inbound and outbound).
 |
|---|
| Image 38 |
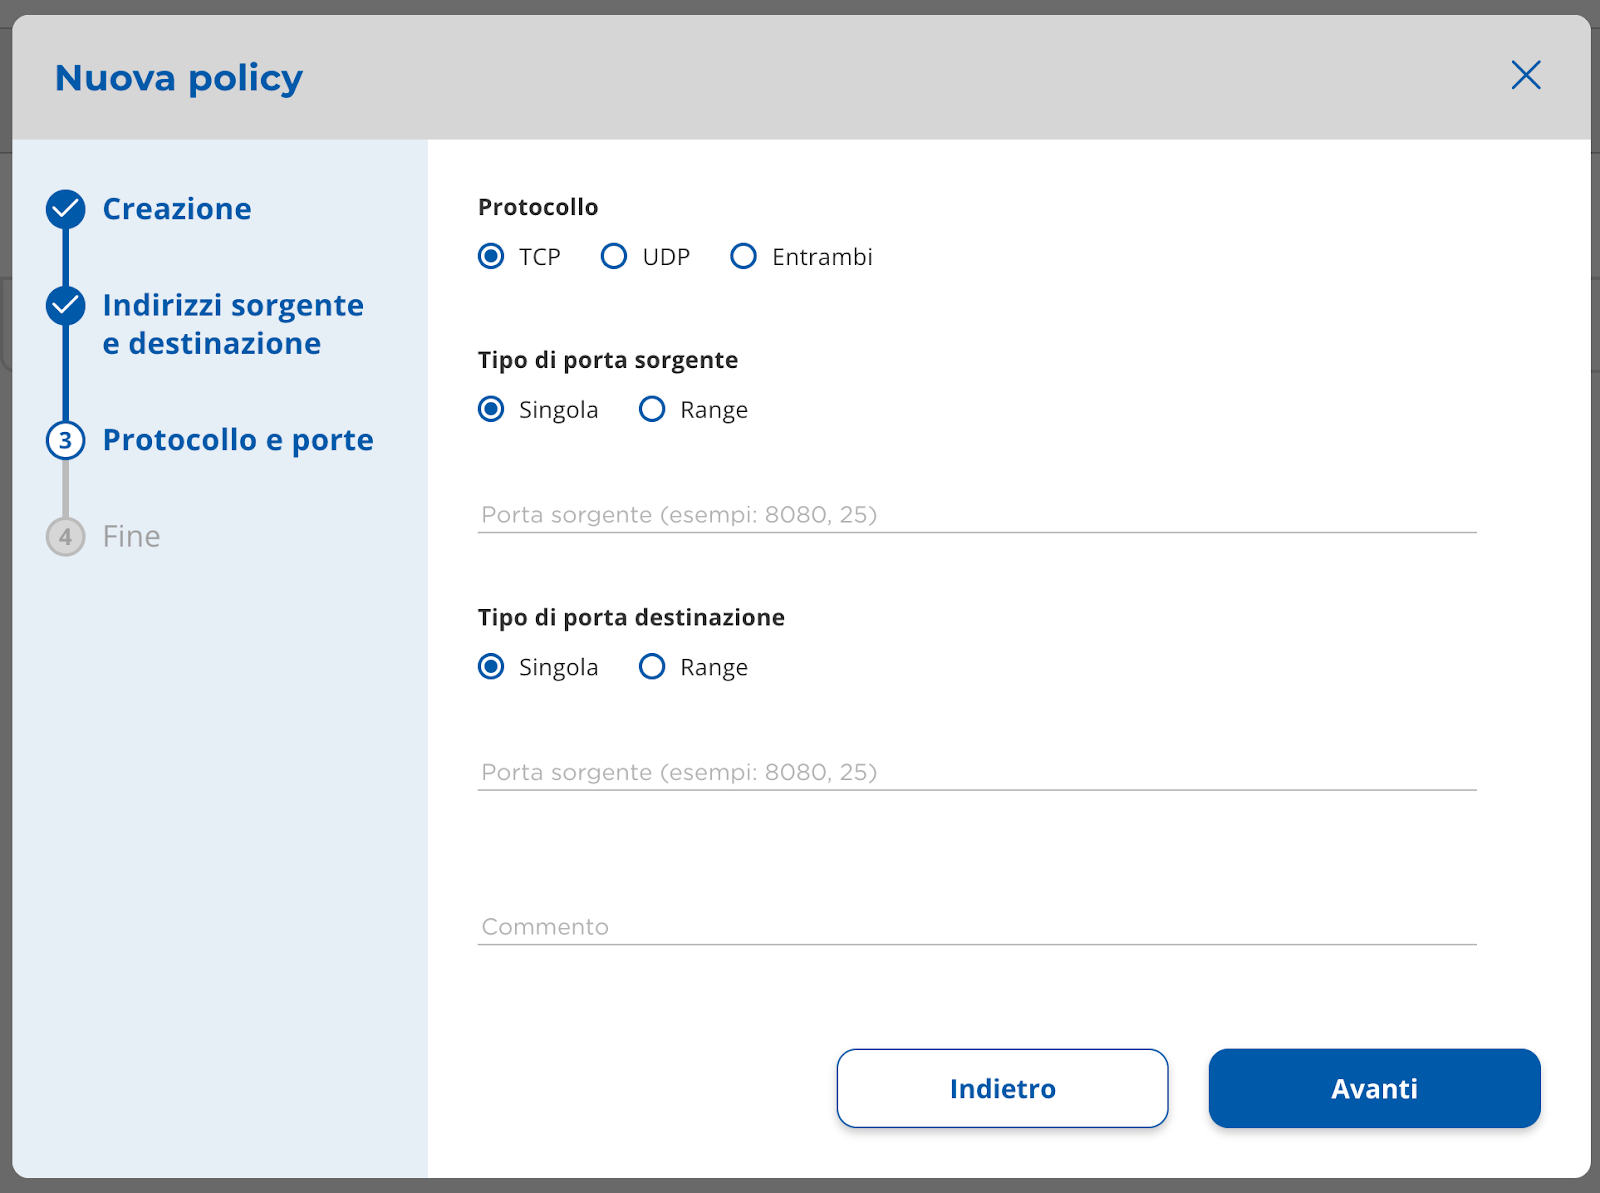
In the third step (Image 39) fields are all mandatory except comment only if
in the first step was selected as "Rule type" "Port".
It is possible to enter as source and destination port either a single port or a range of ports.
 |
|---|
| Image 39 |
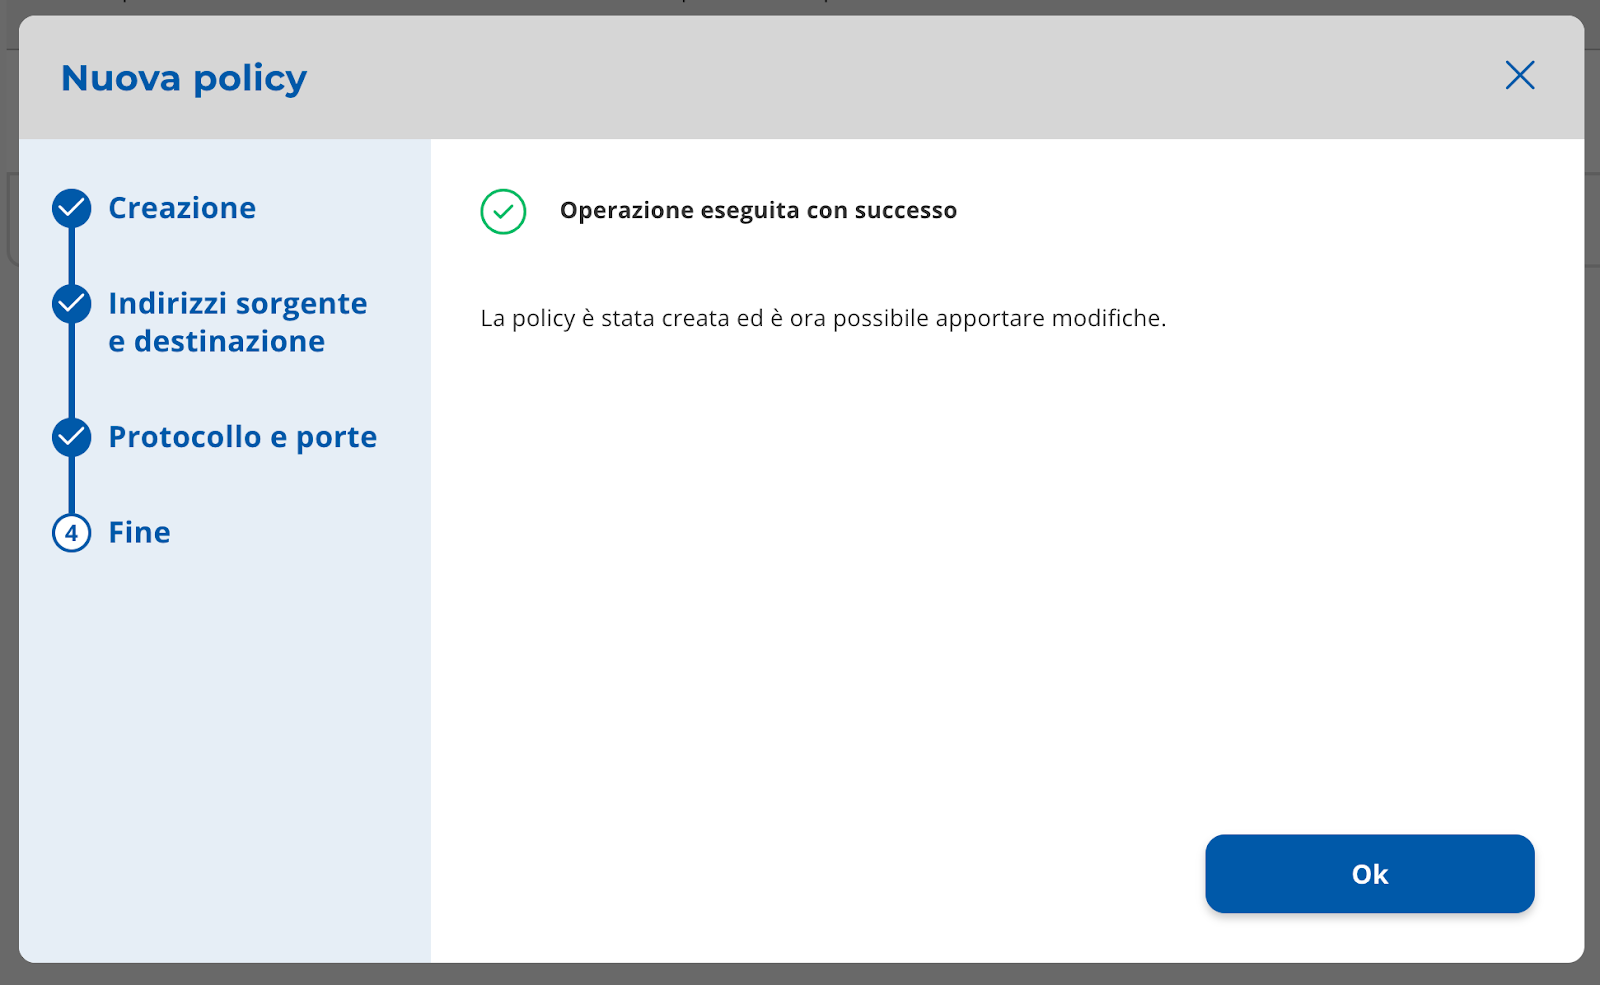
Final saving step (Image 40).
 |
|---|
| Image 40 |
Procedure for changing policy
To change a policy you must select the button with the pencil symbol in the row of the table (Image 36
- 5).
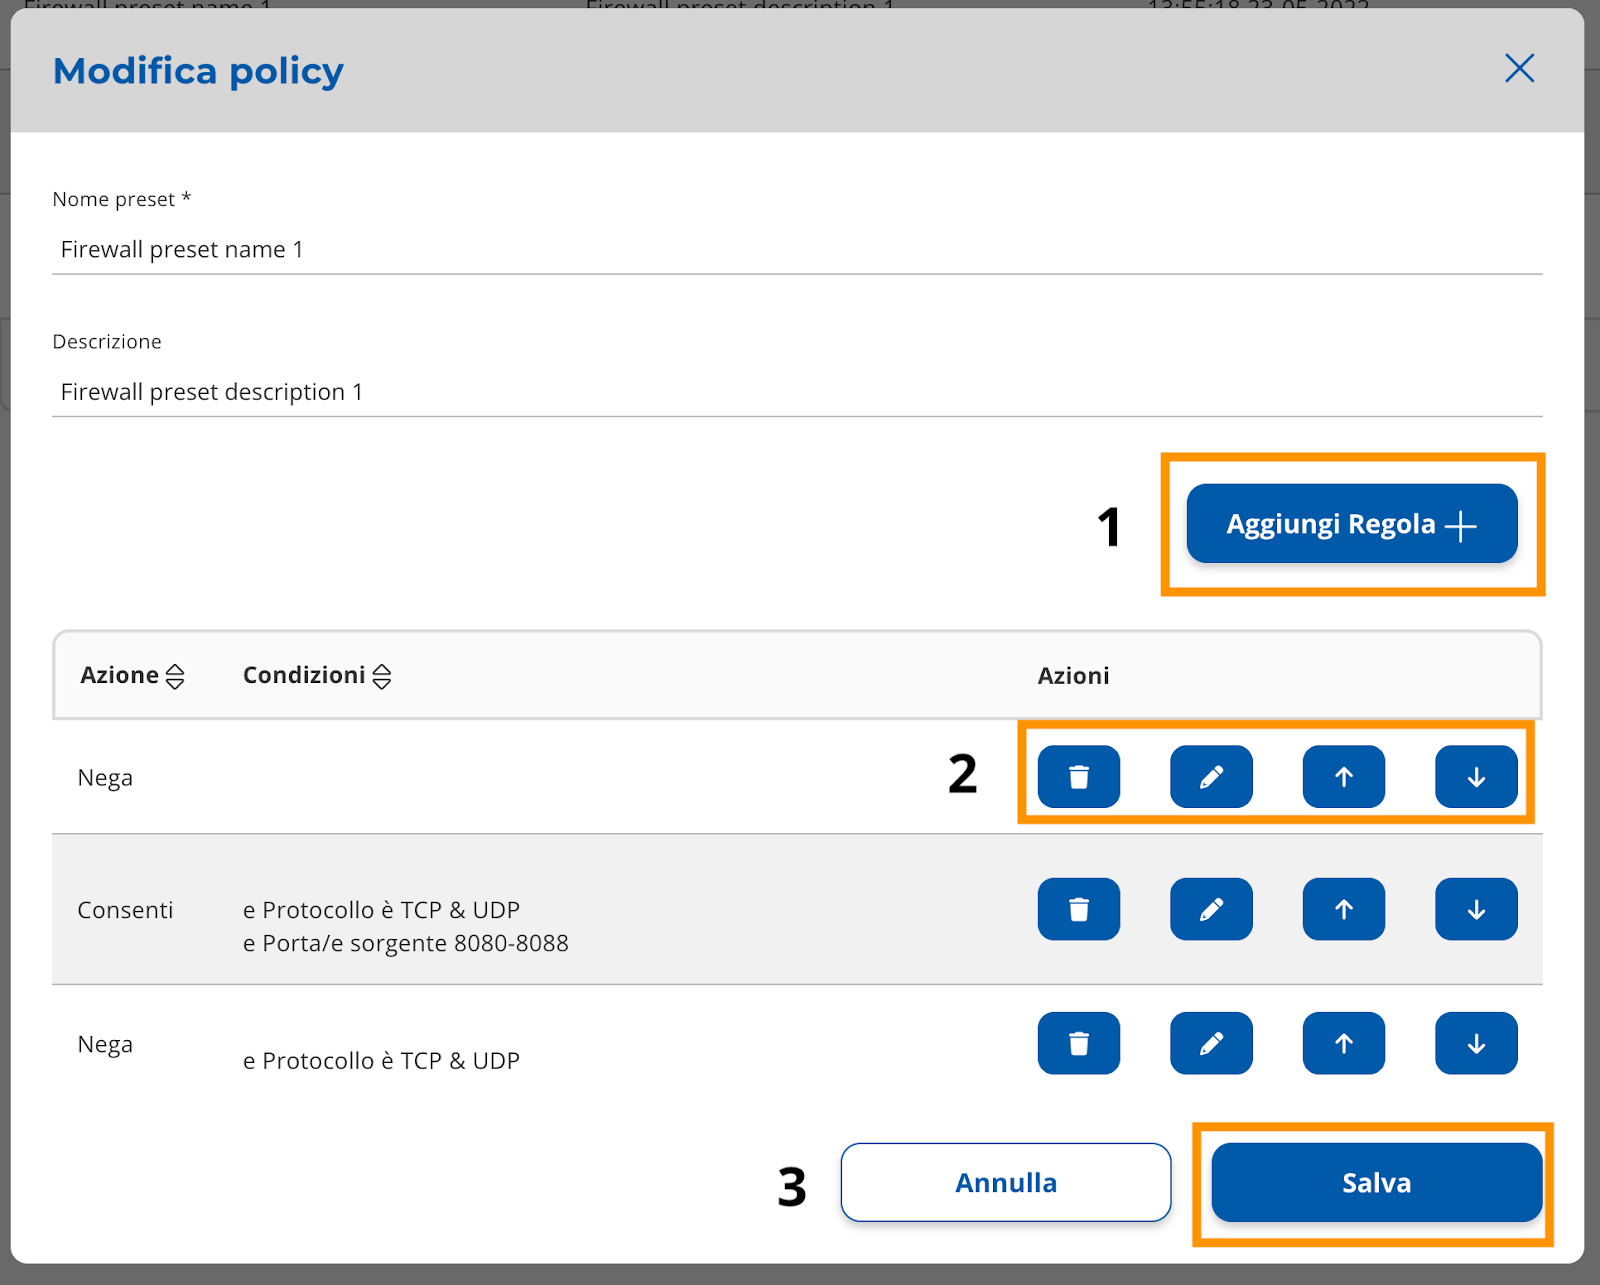
The editing layer (Image 41) allows to:
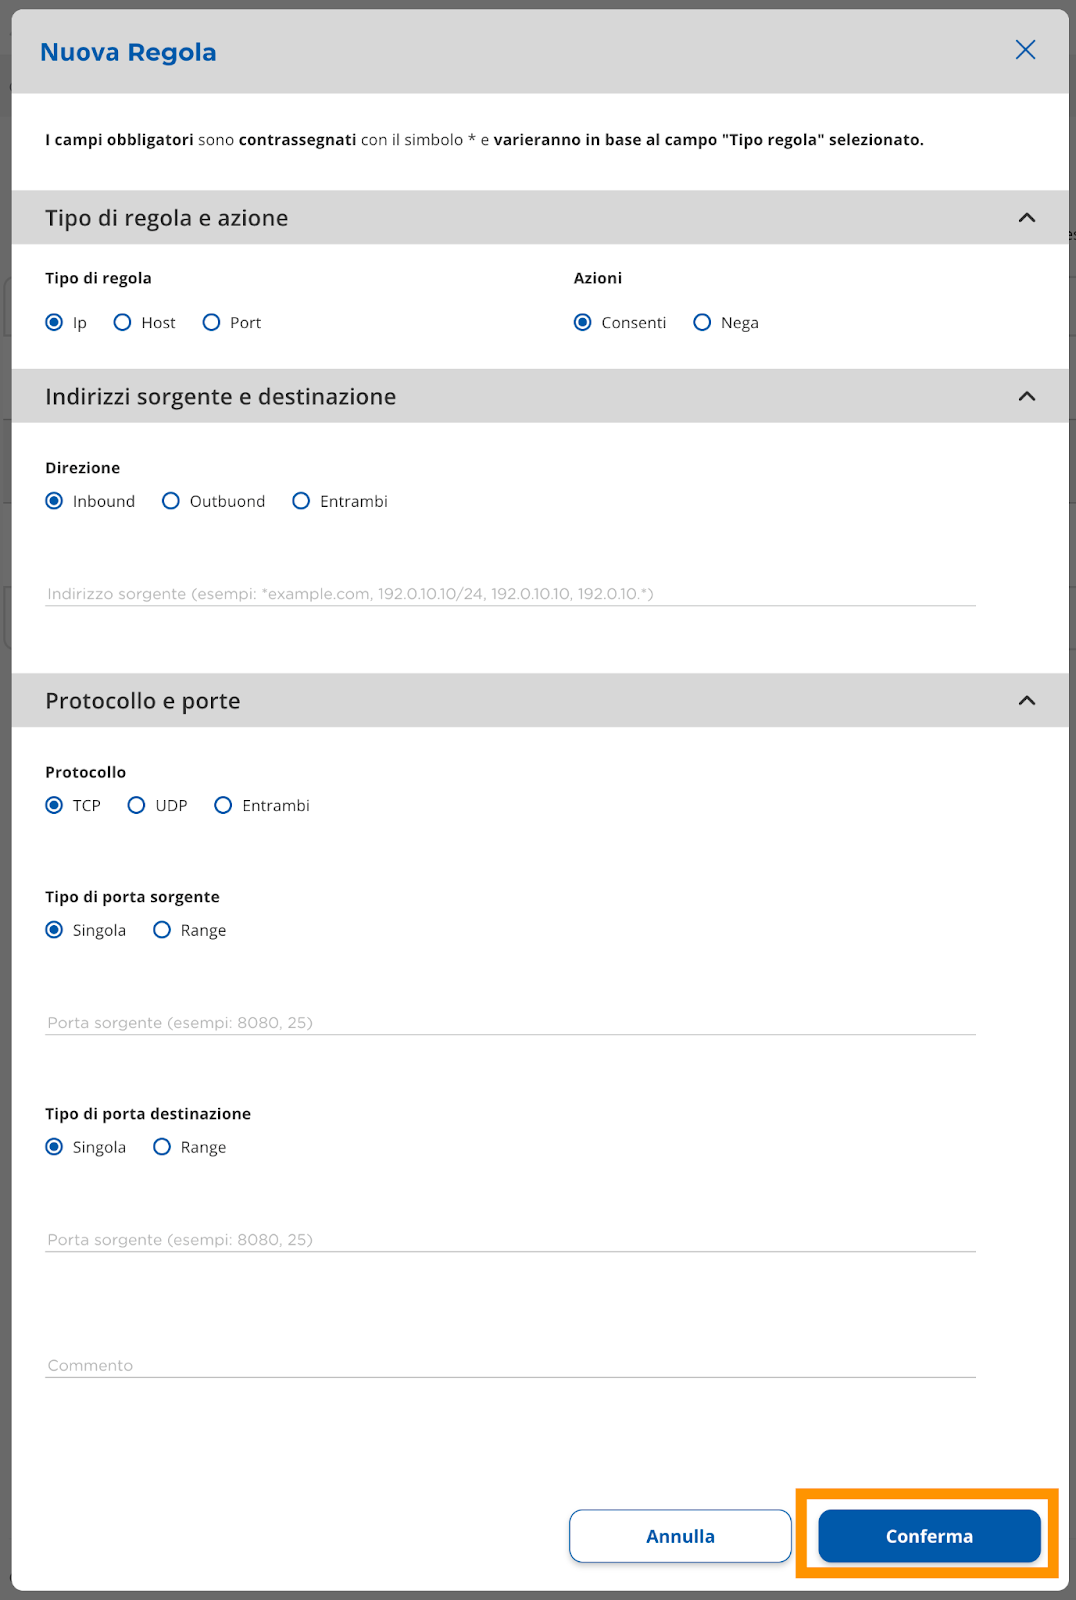
- Add a rule to the policy. By clicking on "Add Rule +” a layer will open (Image 42) with the elements of the wizard and with the same dynamics for the required fields previously seen.
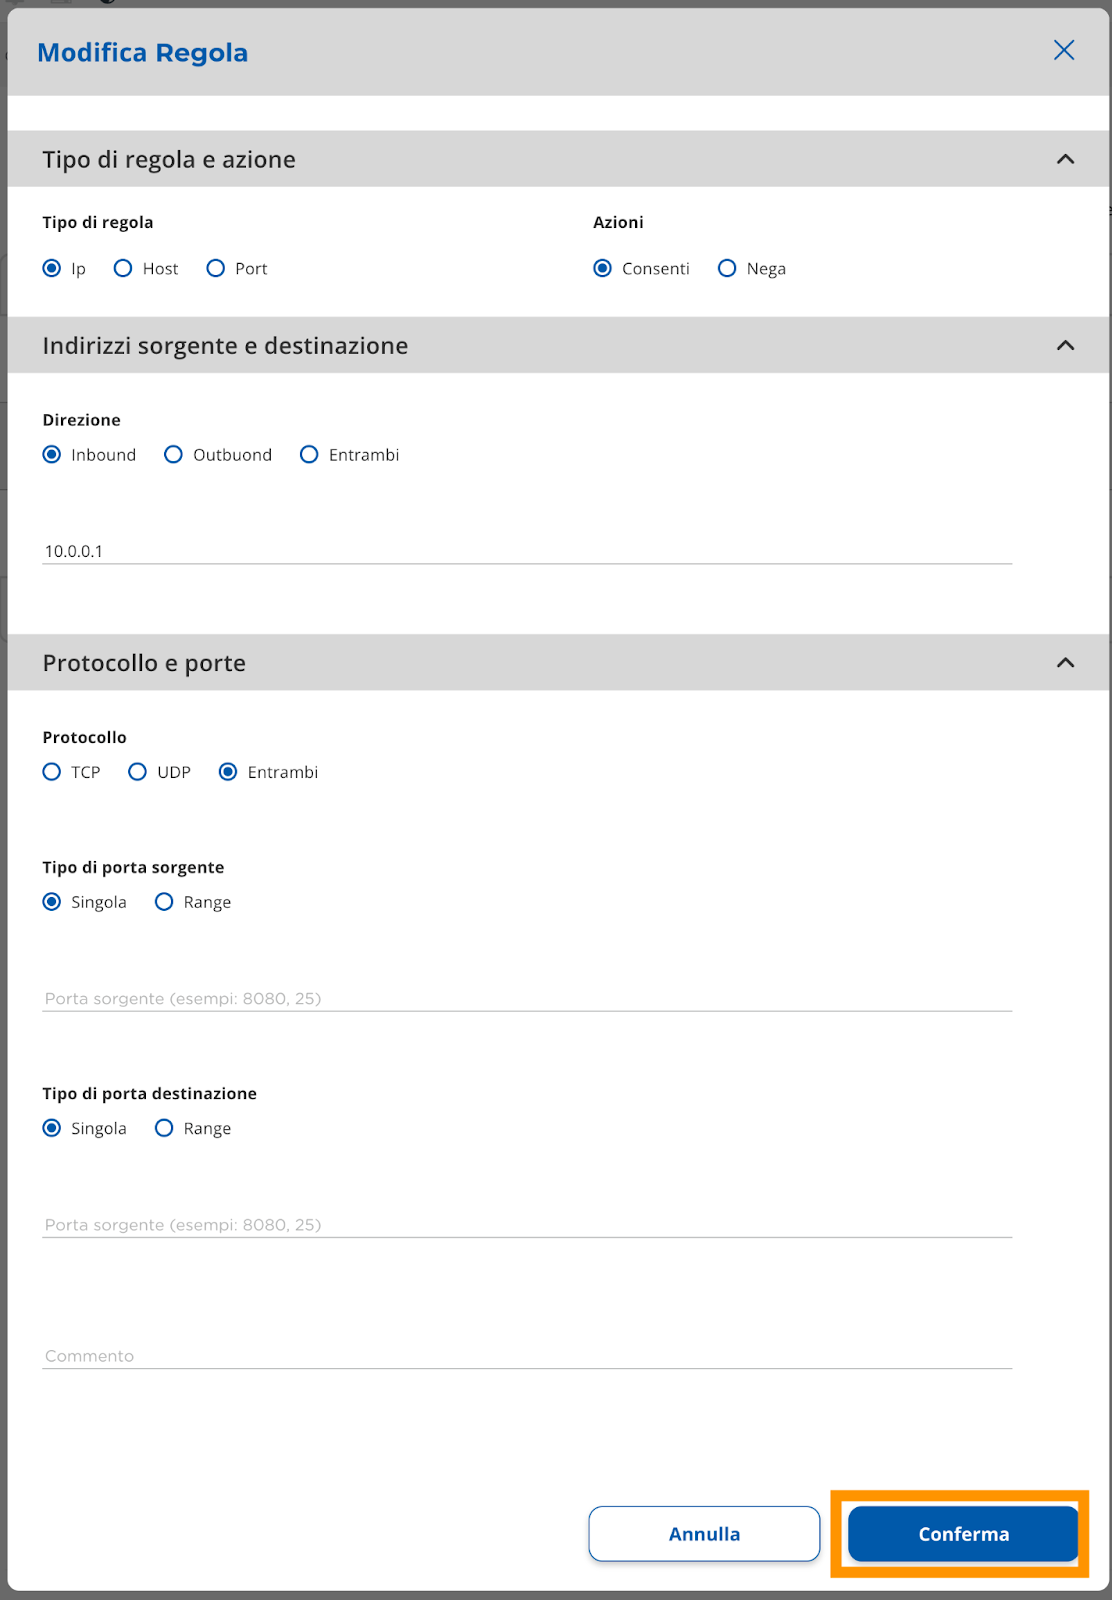
Clicking on the "Confirm" button will save the entered data and the rule will be created. - Eliminate, change or move the already created rules. Clicking on the pencil button will open the editing layer to make changes in the rule (Image 43). Clicking on the "Confirm" button will save the changes.
- The “Save” button will allow to save all policy changes.
 |
|---|
| Image 41 |
 |
|---|
| Image 42 |
 |
|---|
| Image 43 |
